Auto-detect first; manual choice is saved
Auto-detect first; manual choice is saved
High-Exposure Kig Styling: Test the Light Before the Shoot
Map visible areas, camera distance, body-layer coverage, endpoints, garment edges, and support before turning a clean exposed look into a shoot.
Contents
Now · Map the visible areas before choosing the skin
Quick take
A high-exposure Kig look is not simply fewer clothing layers. Visible skin-like areas should come from Kig skin, hadatai, or zentai coverage rather than exposed real neck, hands, feet, or broken tone gaps. Start with what appears on camera, how close the lens gets, and whether the look will go offline; then plan tone, thickness, opacity, endpoints, garment edges, and support.
Map the visible areas before choosing the skin
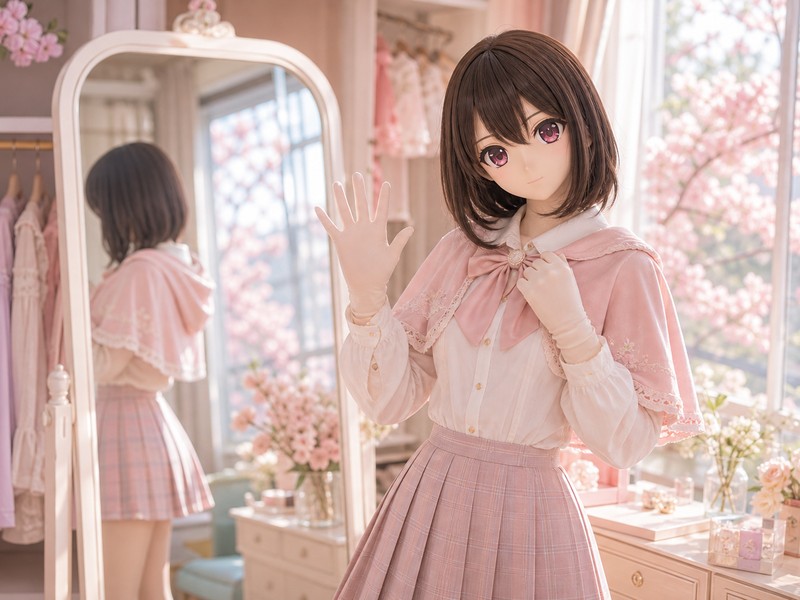
The first spark is easy: bare-looking shoulders, summer sleeves, light outer layers, and a clean full-body line can make the character feel airy right away. Do not begin with ‘thin or thick skin’. Open the reference and mark every area that will enter the frame: neck, shoulder line, upper arm, forearm, wrist, hand back, side waist, back line, leg, ankle, instep, and toes.
Exposure is not one total number; it is a map. What appears in a straight pose, from the side, during an arm lift, while sitting, turning, holding a bag, or stepping forward? Skip that map and a breezy summer look can quietly invite wrist edges, shoe openings, strap pressure, and neck color gaps into every close-up.

- Default visibility: neck, shoulders, arms, legs, ankles, and hands that appear while standing.
- Motion visibility: edges that appear only when raising arms, turning, sitting, bending, carrying a bag, or holding props.
- Close-up visibility: wrist gaps, finger seams, toe tips, neckline, strap pressure, sleeve edge, and shoe opening.
- Coverage helpers: wig ends, shawls, jackets, long sleeves, socks, shoe shape, and props can lower pressure without killing the look.
Tone continuity: shell, neck, wrists, and ankles should not live separate lives
High-exposure Kig styling breaks fastest when the colors split. The shell reads one temperature, the neck cover another, the wrists drift somewhere else, and the ankles suddenly join a different drama. Check the hard animegao head shell, separate Kig-skin neck, wrists, ankles, and garment edges in one lighting plan.
Do not trust a screen color alone. Fabric may look lighter when stretched, stronger light can reveal more opacity issues, warm rooms can push yellow, and cool venue light can gray out the skin base. Deep skin tones, special colors, markings, gradients, and fantasy designs need extra questions about stretch, cleaning, rubbing, and light shift.

- Same-light check: shell cheek, lower rim, neck fabric, wrists, ankles, and garment edges together.
- Stretch check: worn fabric can become lighter, brighter, or more transparent than a flat swatch.
- Light check: daylight, studio light, warm indoor light, and cool venue light are separate tests.
- Edge check: neckline, sleeve edge, sock line, and shoe opening are where color breaks show first.
Thickness, opacity, and heat are one triangle
High exposure1 does not automatically mean the thickest skin, and thin does not automatically mean refined. Thicker Kig skin can improve coverage and calm body lines, but it may add heat, edge bulk, and movement pressure. Thinner fabric can feel lighter and closer to the body, while strong light, base-layer marks, and close-up texture become less forgiving.
The practical question is camera distance and wear time. A studio close-up, full-body shoot, short video, outdoor walk, and long event each stress a different part of the triangle. Close-ups test texture and endpoints; full body tests proportion and shoe line; video tests moving wrinkles; offline wear tests cooling, hydration, and access routes.

- Close-up priority: texture, opacity, cuffs, finger gaps, toe tips, and seam shadows.
- Full-body priority: shell-body proportion, leg line, skirt coverage, and shoe opening.
- Video priority: raised arms, turning, sitting, walking, wrinkles, and garment edges.
- Offline priority: heat, hydration, sightline, rest points, access routes, and quick exit.
Garment edges decide whether exposure reads clean
The amount of exposure is rarely the real problem. The edge is. A neckline can crowd the shell rim, a strap can press a hard fold, a sleeve can cut the wrist, a skirt can shift when sitting, and a shoe opening can make the foot look larger than intended. These are styling and camera-planning problems, not body judgments.
The clothing layer should sit on top of a continuous Kig-skin base, not behave like a patch stuck to the surface. Shawls, short jackets, wig ends, sleeve length, wrist accessories, sock height, shoe shape, and props can help the exposed design stay elegant. Coverage is not cowardice; it is the stylist quietly saving the frame.

- Neckline: shell lower rim, neck cover, wig ends, and collar height should meet calmly.
- Straps: avoid pressure marks, slipping, or thin straps that slice the visual line.
- Sleeves: wrist endpoints and access routes need a natural finish.
- Hem and waist: raised arms, sitting, and turning should not break the plan.
- Shoes: shoe shape and covered feet are judged together, not after the look is finished.
Hands and feet need a close-up rehearsal
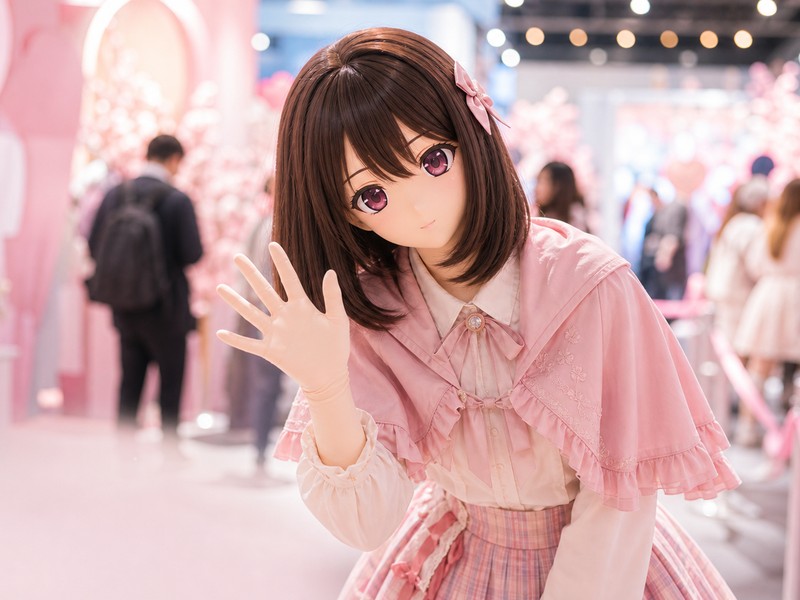
Hands and feet enter the frame more often in exposed designs. Hands need covered five-finger Kig fabric, believable palm width, natural fingertip shape, and a wrist edge that can be held by sleeves or accessories. Feet need covered five-toe construction, instep line, ankle folds, shoe-opening space, and stable shoe proportion. A beautiful full-body frame does not automatically mean the endpoints can survive a close-up.
If hands and feet are not the character focus, long sleeves, gloves, socks, shoes, skirt coverage, or props can lower the pressure. If the character asks for visible hands or feet, check finger gaps, toe tips, wrist edge, ankle edge, shoe fit, and action use up close. Five digits are the baseline; the tips, gaps, and edges are the actual audition.

- Hands: five fingers, palm direction, finger length, inner-wrist access, and sleeve coverage.
- Feet: five toes, instep shape, ankle wrinkles, shoe opening, and sole stability.
- Close-ups: wrists, finger gaps, toe tips, sleeves, socks, and shoes each need a look.
- Motion: phone use, bag carrying, skirt holding, sitting, and walking expose endpoint problems quickly.
Camera distance, light, and support make the look wearable
The same Kig skin behaves like different material across distance. Full body reads proportion, half body reads shoulders and wrists, close-up reads texture and color breaks, and detail shots bring endpoints and fabric surface right to the front. The cleaner the exposed look is, the more deliberate the camera distance needs to be.
Offline plans cannot borrow studio logic forever. Heat, sightline, hydration, shell weight, wig coverage, crowd movement, and event length still exist even when the outfit looks light. Maintenance openings, support roles, rest points, and exit routes belong in the plan before the first pretty frame.

- Full body: shell-body proportion, outfit volume, leg line, and shoes.
- Close-up: tone continuity, fabric texture, wrist edge, finger gaps, and neckline.
- Strong light: opacity, base-layer marks, wrinkle shadows, and color shifts.
- Support: watch the surroundings, hold the bag, manage hydration, check the wig, and remind the wearer to rest.
Use one shared plan for the maker, photographer, support, and wearer
A high-exposure look becomes calmer when everyone works from the same practical brief. For the maker or studio, record visible areas, shell tone, neck carry, thickness, endpoints, openings, garment edges, wear time, and special colors. For the photographer, record distance, angles, full-body versus close-up priority, light tests, and which endpoints should not be pushed into the foreground.
Give support the practical plan: water, rest, cooling, bag handoff, wig checks, shell removal, and stop conditions. Keep fitting tests, maintenance records, and other private process photographs out of casual sharing.
- Maker / studio: visible areas, shell, neck cover, tone, thickness, endpoints, openings, garment edges, and wear time.
- Photographer: full body, half body, side/back angles, distance, light, and endpoint pressure.
- Support: hydration, rest point, bag handoff, shell removal, cooling, and stop signals.
- Privacy: separate finished photographs from fitting tests, maintenance records, and anything containing identities, interfaces, or watermarks.
Reading notes
- This guide discusses character styling, coverage structure, photography, and safe wear.
- Visible skin in high-exposure images should come from Kig skin / hadatai / zentai coverage, not real neck, hands, feet, or broken tone gaps.
- High exposure is not written as a bravery test, body judgment, or suggestive framing.
Continue reading
Kigurumi Structure Field Guide: Skin Is Skin, Head Is Head
A polished Kig look does not come from blurring every part into one soft filter. Read the structure clearly: the animegao head is a manufactured hard shell, the lower rim meets an independent hadatai neck cover or collar, hands and feet continue the fabric-skin logic, and the outfit sits over that base.
Continue reading →Animegao Head-Shell Design Guide: The Face Is Built Before It Is Painted
An animegao face is not finished by adding big eyes and blush. Read the hard shell first: forehead, low-relief nose, cheeks, chin, mouth, lower rim, and profile should feel like one manufactured surface. Eye plates, eyeliner, blush, highlights, wig edge, neck transition, and camera angle then support that structure.
Continue reading →Kig Proportion in the Frame: Shell, Wig, Outfit, and Camera
Kig head-body proportion is not a height chart or a single head-size verdict. The hard shell, wig volume, lower rim, neck cover, shoulders, waistline, outfit volume, shoes, endpoints, movement, and camera distance build the result together. Use proportion as a styling adjustment, not a body score.
Continue reading →