Auto-detect first; manual choice is saved
Auto-detect first; manual choice is saved
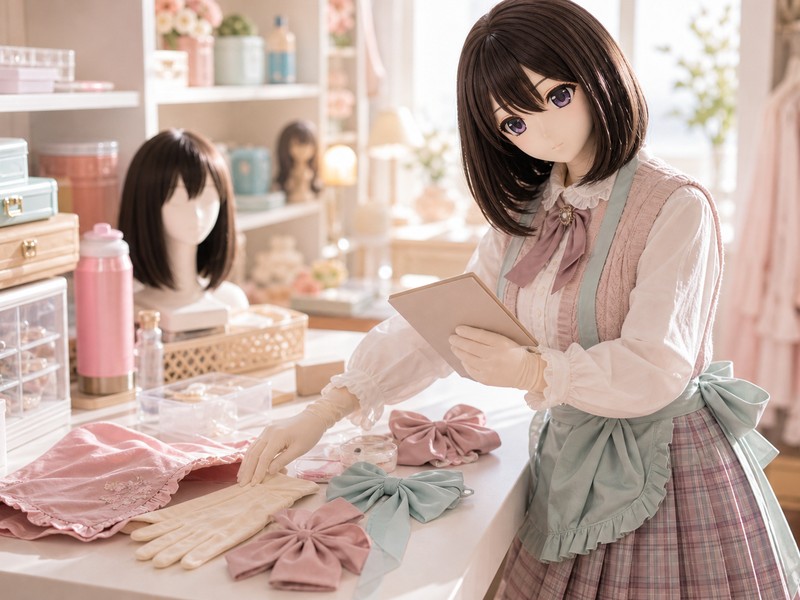
Kig Budget Calculator: After the Low-Price Spark, How Far Should This Order Go?
Do not judge a low tag as good or bad on sight. Lay out the tag, setup, add-ons, and pause line so the spark can become a trial, a custom plan, a configuration confirmation, or a saved-for-later note.
Contents
Now · The low-price spark is real; pause before calculating
Quick take
A low shopping-page price can make checkout feel only one step away. Pause long enough to change the question from “Is this cheap?” to “What does this payment actually cover?” The answer may support a trial, custom planning, a clearer option list, or a decision to wait.
The low-price spark is real; pause before calculating
A Kig budget often starts while the excitement is still warm. A reference photo, a character mood, and a low entry price can light up the same thought: perhaps this can become real. That spark is allowed to exist. The useful next step is simply to keep it from signing the order before the total cost is visible.
Budgeting is not a bucket of cold water. It asks where this spark wants to appear: home try-on, distant photos, close-up studio shots, a short convention, or a longer outdoor plan. A low tag is at most a reason to test comfort and interest; it should not be forced to carry close-up endpoints, event logistics, rework expectations, and long-term use all at once.
- Start by admitting the spark, then name the scene instead of grading the spending level.
- Home try-on, distant photos, close-ups, and offline events need different buffers.
- A low entry tag is not automatically wrong, but it often has not stated the full scope.
- The next move can be asking, waiting for references, or saving the plan for later.
Run the tag through four filters: search price is not delivered cost
The easiest mistake starts at the search tag: a number feels reachable, and the mind quietly fills in “probably around this much.” Split it into four separate amounts: the search-page tag, the product-page display price, the SKU or configuration wording, and the maker-confirmed order total that can actually enter the budget.
Using only the search tag is like buying every piece of merch from a movie poster. It shows what caught the eye, but not whether the main item, hands and feet, access openings, shipping, rework, and event logistics are included. Promo price, coupon price, and platform-subsidy price are also dated page conditions; record the date, conditions, and selected SKU, then rely on the maker-confirmed delivered total before budgeting.

- Search tag: entry signal and seed of attraction, not the full budget.
- Product-page price: display wording that still needs inclusion checks.
- SKU/configuration wording: closer to the target setup, but it does not confirm quality or final cost.
- Maker-confirmed total: included items, add-ons, shipping, lead time, and rework boundaries.
First identify what the listing sells: Kig skin, head shell, or payment link
A kigurumi search result can mix Kig skin, hard head shells, blank shells, hand items, nail items, non-baselayer accessories, top-up links, and display pages. Compare prices only within the same category, setup, and payment context; before that, price is only a clue. Otherwise a hand-item tag, a display page, or a head-shell balance link can be mistaken for a complete finished setup.
The main item is not a magic word either. It may include only a base body layer, it may include hands and feet, or it may be only a configuration doorway. Before paying, write down body fabric, neck transition, hands, feet, face-window handling, back entry, access openings, packaging, storage, and shipping. What is written can be expected; what is not written stays in the question column.
- Separate categories first: Kig skin, head shell or blank shell, hand/nail items, non-baselayer accessories, top-up links, and display pages.
- Then separate the main item: body, fabric head cover or face window, hands, feet, access openings, packaging, and storage.
- All-inclusive1, Kig setup, and custom-fit wording are question starters, not automatic full-set promises.
- If comparable references or key details are missing, reduce confidence instead of judging shop quality.
Translate all-inclusive, deposit, and add-on links into setup details
Shopping-page words create a fast feeling of ownership: starting tag, full payment wording, deposit, final payment, add-on, top-up, special listing, and display-do-not-buy all look like money, but they are not the same kind of money. The budget question is not only whether the number feels high or low; it is which item, which setup, and which payment node the number belongs to.
Add-ons are not the enemy. Color sample checks, thickness, special size, five-finger hands, five-toe feet, face window, large U access, rush timing, and storage may be included, may be SKU wording, or may be a confirmed add-on. When each payment maps to main item, setup, amount, lead time, and rework boundary, it stops becoming a surprise.
- Question for the maker: is this tag a search entry, SKU total, deposit, final payment, or add-on settlement?
- All-inclusive check: which body, neck, hand, foot, access, packaging, and shipping items are included?
- Add-on check: price-difference, small top-up, and single-order-not-shipped links may be settlement entries for already-discussed details; confirm which main order, setup, lead time, and rework terms they bind to.
- Display-do-not-buy: treat it as style and configuration context only, not a budget line; ask for the buyable link, selected SKU, and actual transaction context.
- Order-note draft: main item [ ]; selected SKU/spec wording [ ]; includes [ ]; excludes/separate [ ]; add-on or special listing [title + amount + mapped setup]; in-stock/preorder/lead time [ ]; latest arrival date [ ]; rework terms [feedback window + shipping + change count].
The last ten centimeters: hands, feet, and access openings
Hands, feet, and access openings are not tiny notes at the edge of the budget. Fabric hands, nail pieces, five-finger separation, wrist connection, hand-side opening, toe structure, sole handling, face window, back entry, and large U access can affect cost, lead time, rework, and event comfort. In close-ups, continuity often breaks at fingertips, wrists, ankles, and opening edges.
Do not use zipper-related wording to estimate Kig skin access costs immediately. It may refer to a zipper pull, head-shell structure, display page, deposit, final payment, or detail add-on. The useful question is always location, purpose, operation, concealment, and whether it belongs to the confirmed setup.
- Hands: same-color material, five-finger separation or hand-sock setup, fingertip thickness, wrist connection, and phone use.
- Feet: attached feet, covered feet, separated toes, sole handling, and shoe space.
- Access: face window, back entry, wrist or palm-side opening, and large U access need location, length, operation, concealment, and add-on checks.
- Inspection: keep close-ups of hand back, palm, fingertips, wrist, natural bend, holding action, and toes, so later rework or review does not rely on memory.
Time also enters the bill: preorder, in-stock, and event day
Preorder does not simply mean waiting a little, and in-stock does not automatically mean it fits the plan. For preorder, ask about cut-off, batch, deposit or final payment, shipping window, and delay handling. For an in-stock item, confirm whether the selected SKU is actually available, which exact piece it is, its size, role, flaws, whether photographs already exist, and whether it can meet the event date.
If the goal is a studio shoot or offline event, the outfit budget is not the whole budget. Count backward: event date minus shipping time, try-on time, rework buffer, and re-confirmation time becomes the latest safe confirmation date. Transport, lodging, venue, photographer, dressing space, hydration, cooling, support person, restroom plan, storage, return packing, and exit path can all arrive on the same day. A smaller budget is not the problem; the question is whether time and logistics can hold it.

- Preorder: cut-off, batch, deposit/final payment, production window, delay handling, and event deadline.
- In-stock: confirm whether this SKU is available, which piece it is, its size, role, flaws, and scene fit.
- Return/rework: custom or special items need clearer boundaries on what can be returned, altered, or reworked.
- Event logistics: transport, dressing, hydration, cooling, helper, storage, restroom, and exit route.
Small costs start queuing after payment: care, storage, and rework
Kig skin is a close-wear item, so the budget cannot end at checkout. Gentle cleaning, pressing out water, shade drying, moisture control, sun protection, color-transfer prevention, clean/dirty packing, spare towels, and storage bags become real after the first try-on. The first storage plan need not be expensive, but home dust protection, event carry, and pressure-safe transport are different jobs.
Rework may never be needed, but if it is needed, timing, photos, shipping, material fees, and the number of changes matter. Fit, tone difference, openings, endpoints, zippers, seams, and material issues may each have different feedback windows. Product copy and comments can be recorded as clues; they are not objective tests or shop certificates.
- Care: gentle cleaning, water pressing, shade drying, sweat and odor handling, and full drying before storage.
- Storage: soft bag or hard case, pressure protection, moisture control, and room for hard wigs or accessories.
- Rework: feedback deadline, required photographs, shipping, material fee, change count, and responsibility boundary.
- Arrival-day photos: front/back overview, neck connection, hand back, palm, fingertips, wrist, natural bend, holding action, toes, sole, face window, back entry, large U, seams, and visible tone differences.
- Before rework: confirm feedback window, photo format, free/paid scope, round-trip shipping, material fee, change count, and rework lead time.
- Product copy and comments can prompt questions; they are not objective quality tests.
Four landings: trial, custom planning, configuration confirmation, or save it for later
The useful outcome is not a supposedly correct spending number, but a point where the plan can stop safely. Some orders are good for trial wear, some deserve custom planning, some need configuration confirmation, and some simply do not have enough time, logistics, detail, or budget yet. Saving the plan, asking again, or waiting for references does not mean the spark has faded.
The phrase that often makes budgets drift is “I already got this far.” It turns time and expectation into a reason to keep adding. A clear spending ceiling shows why each line exists while the cart grows. If the cart crosses that ceiling, return the plan to the saved list and keep the spark for a steadier moment.

- Trial: test comfort, size tolerance, and basic effect without close-up expectations.
- Custom planning: reserve space for endpoints, access openings, storage, and rework confirmation.
- Configuration confirmation: setup, add-on, lead time, rework, or sample conditions still need answers.
- Save for later: scene is unclear, deadline is tight, key setup is unconfirmed, or rework boundary is missing.
Reading notes
- Visible numbers are context clues only; they are not a universal price conclusion or payment advice.
- This tool separates routes, gaps, and questions; it does not choose a seller for the reader.
- Search tag, product-page price, SKU/configuration wording, and maker-confirmed total must stay separate.
Continue reading
The Night Before Your First Kig: What Comes After a Saved Image?
The image that keeps reopening in a late-night favorites folder usually arrives before the shopping cart. The useful question is not ‘what should I buy immediately?’ but what held the eye: the character face, the complete silhouette, the mood of the photograph, or the thought of meeting the character in a real place. That answer changes where the first budget belongs—perhaps a head shell, a Kig skin, an outfit, a short try-on, or a low-pressure studio session.
Continue reading →Your First Maker Message: What Should Be Sent First?
The difficult part of a first Kig skin inquiry is rarely finding enough enthusiasm. The character is clear and the saved images are ready, yet the first message remains unfinished. Begin with the character version, use scene, references already available, existing gear, and the questions that need a maker’s judgment. Measurements, exact options, top-ups, lead time, after-sales terms, and photo permission can follow in later confirmations.
Continue reading →Before Payment: Read the Photo, Product Page, and Maker Reply Separately
A strong Kig photo, a low entry price, or one happy review can make an order immediately tempting. The purpose here is not to kill that interest, but to keep each claim within its proper scope: what the main product and selected SKU say, what each top-up link belongs to, whether additions are separate, when lead time starts, and how after-sales is described. The result is not a shop ranking; it is a clearer maker question and a calmer delivery review.
Continue reading →