Auto-detect first; manual choice is saved
Auto-detect first; manual choice is saved
Standard or Custom? Choose the First Kig Skin by Scene and Fit
The complete-character feeling may already be real. Compare a standard trial, limited adjustment, and custom work by use scene, fit uncertainty, budget, lead time, and after-sales scope.
Contents
Now · Decide what the first piece needs to do
Quick take
The useful question is not cheap versus expensive, but what the first piece must do. A mostly covered outfit, distant photographs, and a comfort trial may suit a standard size. Known length or proportion gaps may justify limited adjustment. Exposed areas, close-ups, offline wear, and strict tone matching deserve a fuller custom discussion.
Decide what the first piece needs to do
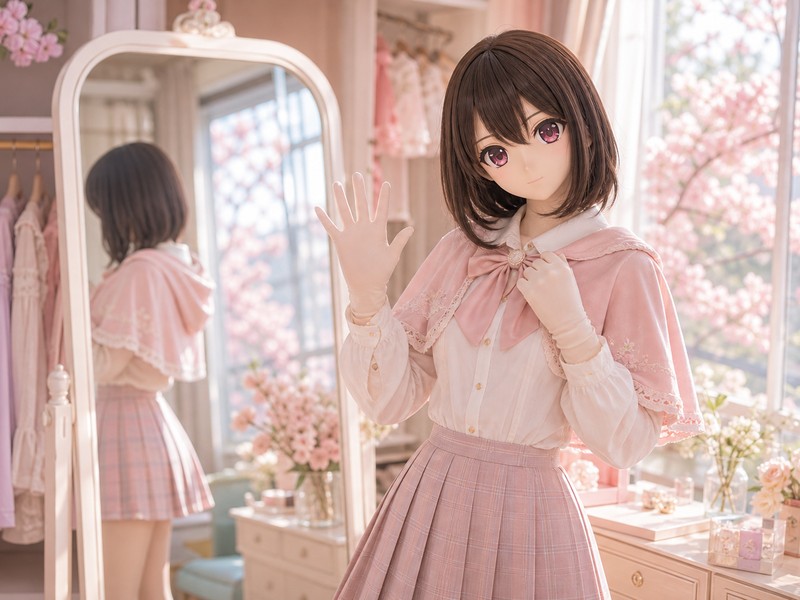
Most readers do not arrive here because they enjoy purchase spreadsheets. They arrive after seeing how a head shell, neck, hands, feet, and costume can finally read as one character body. Then the nervous questions appear: will standard size fit, will custom be too much, and how can the seller be asked without sounding vague?
Begin by naming the first use: a comfort trial, a limited adjustment, formal photographs, event wear, or a pause while key details remain unclear. That purpose decides what to ask, what to pay for, and what not to expect from the first piece.

- Standard trial: first wear, covered outfit, distant photos, comfort check.
- Semi-custom1 buffer: some length or proportion gaps, but not a high-exposure formal shoot yet.
- Custom2 work: exposed skin, close-up photos, offline wear, shell tone, and endpoints need continuity.
- Pause first: SKU scope, add-ons, lead time, openings, rework terms, or relevant try-on details are still unclear.
Standard size is the clothing rack: lower-commitment trial, not low status
Standard size3 can answer a basic question: are the coverage, heat, movement limits, dressing routine, and care demands acceptable? When the outfit covers most of the body and photographs stay distant or personal, a ready-made size may be a practical trial.
Its limit is approximation. Shoulder width, arm length, torso length, leg length, skin tone, five-finger hands, toe shape, and neck transition may be close enough for trial use but not stable enough for close-up formal photos.
- Useful for: comfort testing, covered characters, head-and-shoulder framing, personal photos.
- Ask first: size range, fabric thickness, hand/foot inclusion, face window or back entry.
- Do not expect: perfect tone match, complex proportion correction, invisible close-up endpoints, or all-event durability.
- A tight budget is not embarrassing; unclear expectations are.
Semi-custom is a buffer only when the editable scope is real
Many first buyers bounce between cheaper standard size and full custom. The middle layer is useful only if it names the changeable parts: length, circumference, skin tone, hands, feet, face window, back entry, chest/back room, or waist/hip allowance.
Ask whether the seller changes the pattern, changes only length, or merely offers a different option name. If the scope cannot be confirmed, the label is just packaging.
- Can it change arm length, leg length, shoulder width, waist/hip, hands, or feet?
- Can tone be matched to the shell, color card, or sample photo?
- Are attached hands/feet and maintenance openings included or add-ons?
- How will the change be reviewed, and which photographs or measurements are needed for rework?
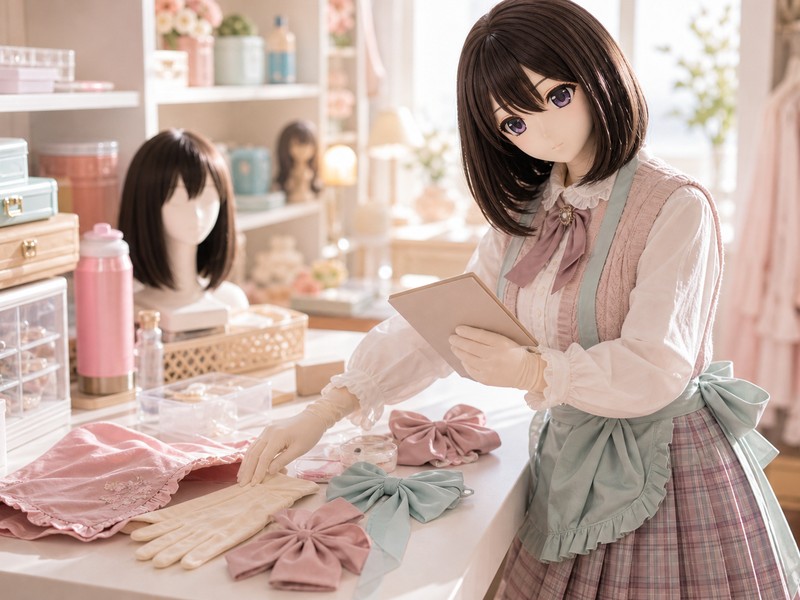
Custom is the workbench: data, tone, endpoints, and openings on the table
Custom becomes meaningful when the character shows shoulders, arms, legs, feet, hands, back, or neck, or when close-up photos and offline wear make every transition visible. It plans around body data, head-shell tone, fabric behavior, endpoints, and maintenance access.
Custom is not a wishing well. Bad measurements, vague references, unclear lead time, unstable fit logic, and fuzzy rework rules can turn high expectations into high friction.
- Body data: height and weight are only the entrance; circumference, length, torso, wrists, ankles, hands, and feet still need the seller’s form.
- Visual data: shell tone, exposed-skin range, shooting distance, lighting, and stretch-lightening should be mentioned early.
- Endpoint4s: compare attached five-finger hands, separate gloves, wrist edge finish, finger length, five-toe feet, sock feet, covered feet, and neck transition.
- Openings: ask purpose, position, length, pull direction, edge finish, hiding method, palm-side access, large U access opening, and review photos.
- Delivery boundary: lead time, tolerance, rework terms, shipping cost, add-ons, and after-sale channel should be saved.
Budget is not the tag; it is the selected options plus what can be confirmed
The displayed price is only the entrance. Skin tone, thickness, attached hands and feet, maintenance openings, special size, rush work, rework, shipping, care tools, storage, and event logistics can all change the real cost.
Listing titles, SKU/options, seller confirmation, review text, buyer photos, try-on photos, and final inspection answer different questions. A beautiful title does not mean the configuration is confirmed for this order.
- Main item: clarify whether body, hands, feet, and neck coverage are included.
- Add-ons: tone, thickness, endpoints, openings, special size, and rush work may be separate.
- Sources: flatlays, structure images, seller text, and order notes each reveal different details.
- After-sale: tolerance, rework trigger, return shipping, and time window should be clear.
- Logistics: washing, drying, storage, color transfer prevention, hydration, and exit planning also belong to the total budget and logistics plan.
Measurements are not a formality: height and weight are only the entrance
A Kig skin is a fitted base. Shoulder, underarm, waist, hip, crotch, knee, instep, wrist, and ankle all negotiate with stretch, wrinkles, and tone changes. Height and weight are useful hints, not the whole answer.
Allowance5 is not a race to the tightest possible fit. Too loose can bunch and drift; too tight can lighten, restrict movement, stress openings, and make long wear miserable.

- Circumference: neck, chest, waist, hip, upper arm, thigh, calf, wrist, and ankle.
- Length: shoulder-to-wrist, torso, inseam/outseam, foot length, foot width, and instep height.
- Hands and feet: hand length, palm width, finger length, toe design, and target shoes should be considered together.
- Movement: standing, sitting, kneeling, walking, half-day events, and ten-minute photos need different allowance logic.
10 questions before paying
A good order is not written by pure excitement; it is shaped by good questions. Keep the tone normal and specific. The goal is to reduce guessing on both sides.
Turn these questions into an order summary: use case, body data, shell tone, endpoints, openings, add-ons, lead time, rework, and total cost. If it affects delivery, keep it in written confirmation rather than only in chat vibes.
- Is this standard size, semi-custom, or full custom, and what can actually be changed?
- Does the main item include body, attached/separate hands, feet, and neck coverage?
- Can skin tone be matched to a shell, color card, or sample, and how does stretch affect tone?
- How are fabric thickness, opacity, reflection, breathability, and under-layer visibility described?
- Which measurement fields does the seller ask for, and how are obvious outliers handled?
- How are face window, back entry, wrist/palm access, and large U access opening handled?
- Are hands and feet five-finger, five-toe, covered, sock-like, separate, or add-on items?
- When does lead time start: payment, measurement confirmation, queue entry, or add-on confirmation?
- What are rework conditions, tolerance, return shipping rules, and after-sale window?
- What is included in the total, and which items are handled through a second payment or add-on listing?
End with a clear first plan, not a graduation certificate
The first Kig skin does not need to be perfect to be useful. It can reveal whether heat, tightness, hand access, toe shape, shell-tone matching, dressing routine, or care matters more than expected.
Standard, semi-custom, and custom are tools for different stages. Buying well is not buying the most expensive piece; it is giving the current excitement a plan that can actually land.
- First scene: home trial, distant photographs, formal studio, or offline long wear?
- Visible areas: neck, shoulders, arms, legs, ankles, hands, or feet in close-up?
- Still unclear: SKU, add-ons, tone, endpoints, openings, rework terms, or relevant try-on details?
- Starting point: standard trial, limited adjustment, full custom discussion, or pause before checkout?
Reading notes
- This article does not frame standard size as low quality or custom as the only correct choice; it sorts first-order decisions by use case.
- External references are used only to surface beginner questions, configurations that need clarification, and costs that are easy to miss. They do not endorse any shop, stock, price, sales volume, lead time, quality result, or service status.
- Images are original planning and configuration diagrams, not buyer photos, store records, live prices, fit results, or final acceptance photographs.
Continue reading
The Night Before Your First Kig: What Comes After a Saved Image?
The image that keeps reopening in a late-night favorites folder usually arrives before the shopping cart. The useful question is not ‘what should I buy immediately?’ but what held the eye: the character face, the complete silhouette, the mood of the photograph, or the thought of meeting the character in a real place. That answer changes where the first budget belongs—perhaps a head shell, a Kig skin, an outfit, a short try-on, or a low-pressure studio session.
Continue reading →Kig Budget Calculator: After the Low-Price Spark, How Far Should This Order Go?
A Kig photograph, a character idea, and a low entry price can make the order feel suddenly reachable. The budget page separates search-result prices, selected options, payment stages, top-up links, storage, rework, and event logistics, then leaves four sensible outcomes: a trial, custom planning, a clearer order, or saving the idea for later.
Continue reading →Measuring a First Kig Skin: A Fitting Record That Can Be Rechecked
Measuring is not a body verdict; it gives the character’s pattern a clear starting point. Use the maker’s current measurement sheet for the order, while a private record keeps net measurements, measuring state, length lines, hands and feet, use scenes, and access openings in one unit system. Necessary photographs should show only the measuring points, with faces, room details, platform interfaces, and unrelated private information cropped away.
Continue reading →